Help Center > Bulk Import Clients
How to Bulk Import Clients in SLP Score (Using CSV)
Save time by importing multiple clients at once
If you manage multiple students, bulk importing clients can save hours of manual data entry.
SLP Score allows you to upload a properly formatted CSV file and import multiple clients at once.
Step 1: Navigate to Clients
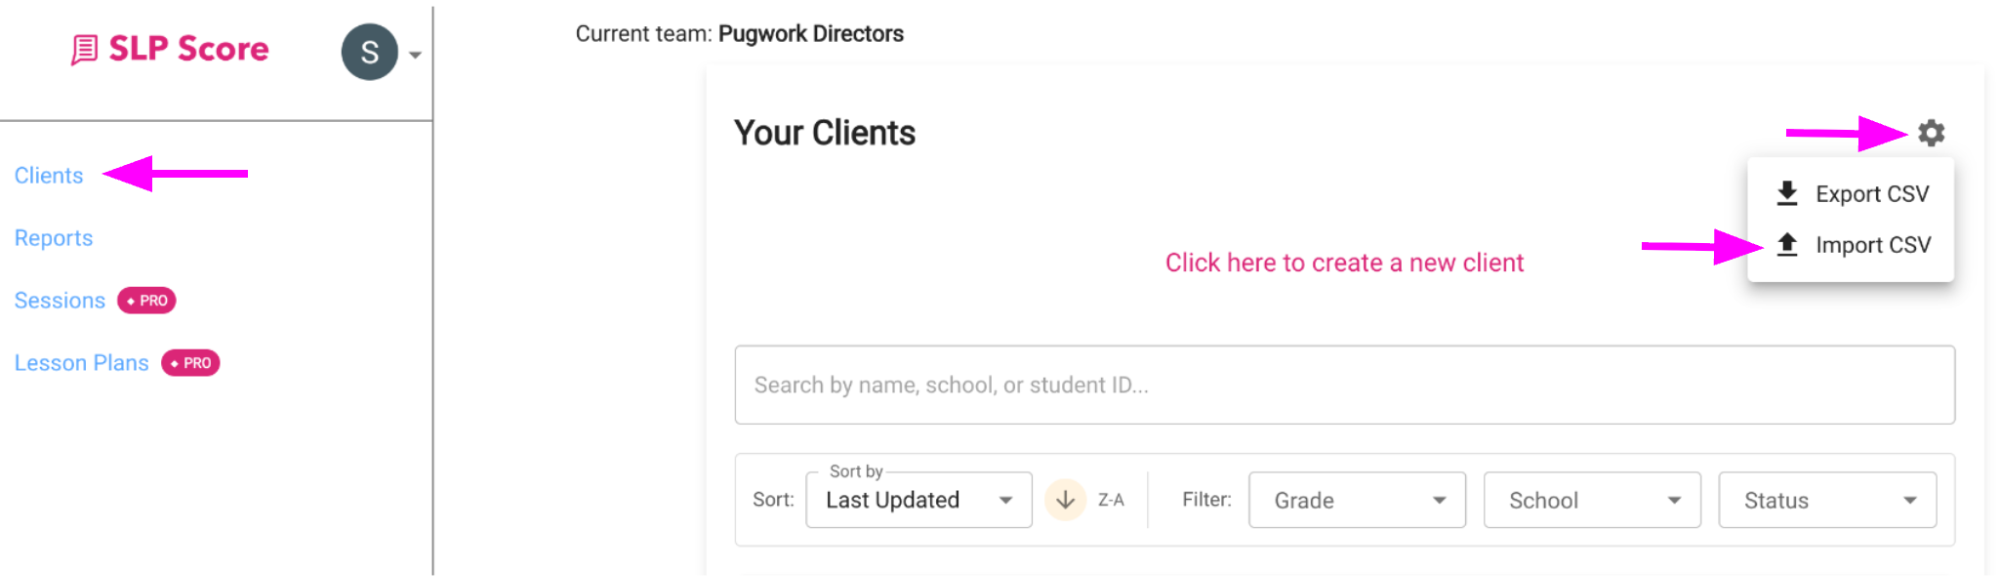
- Click Clients in the left sidebar
- Click the Settings gear in the top right corner
- Select Import CSV
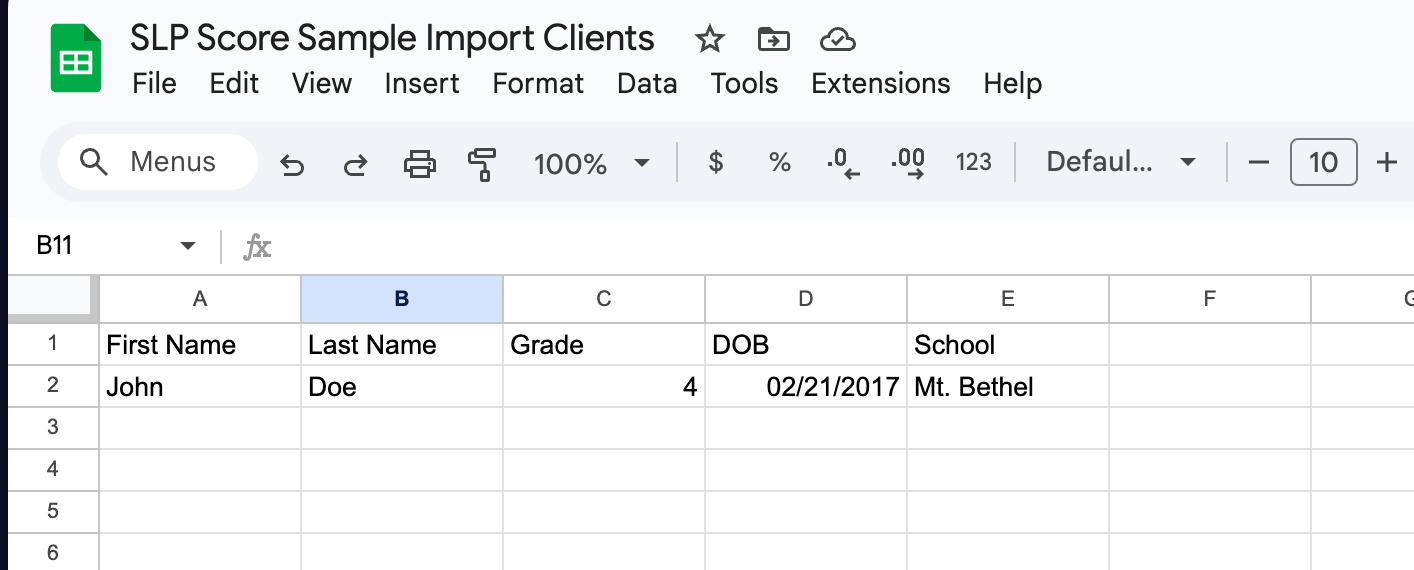
Step 2: Prepare Your CSV File
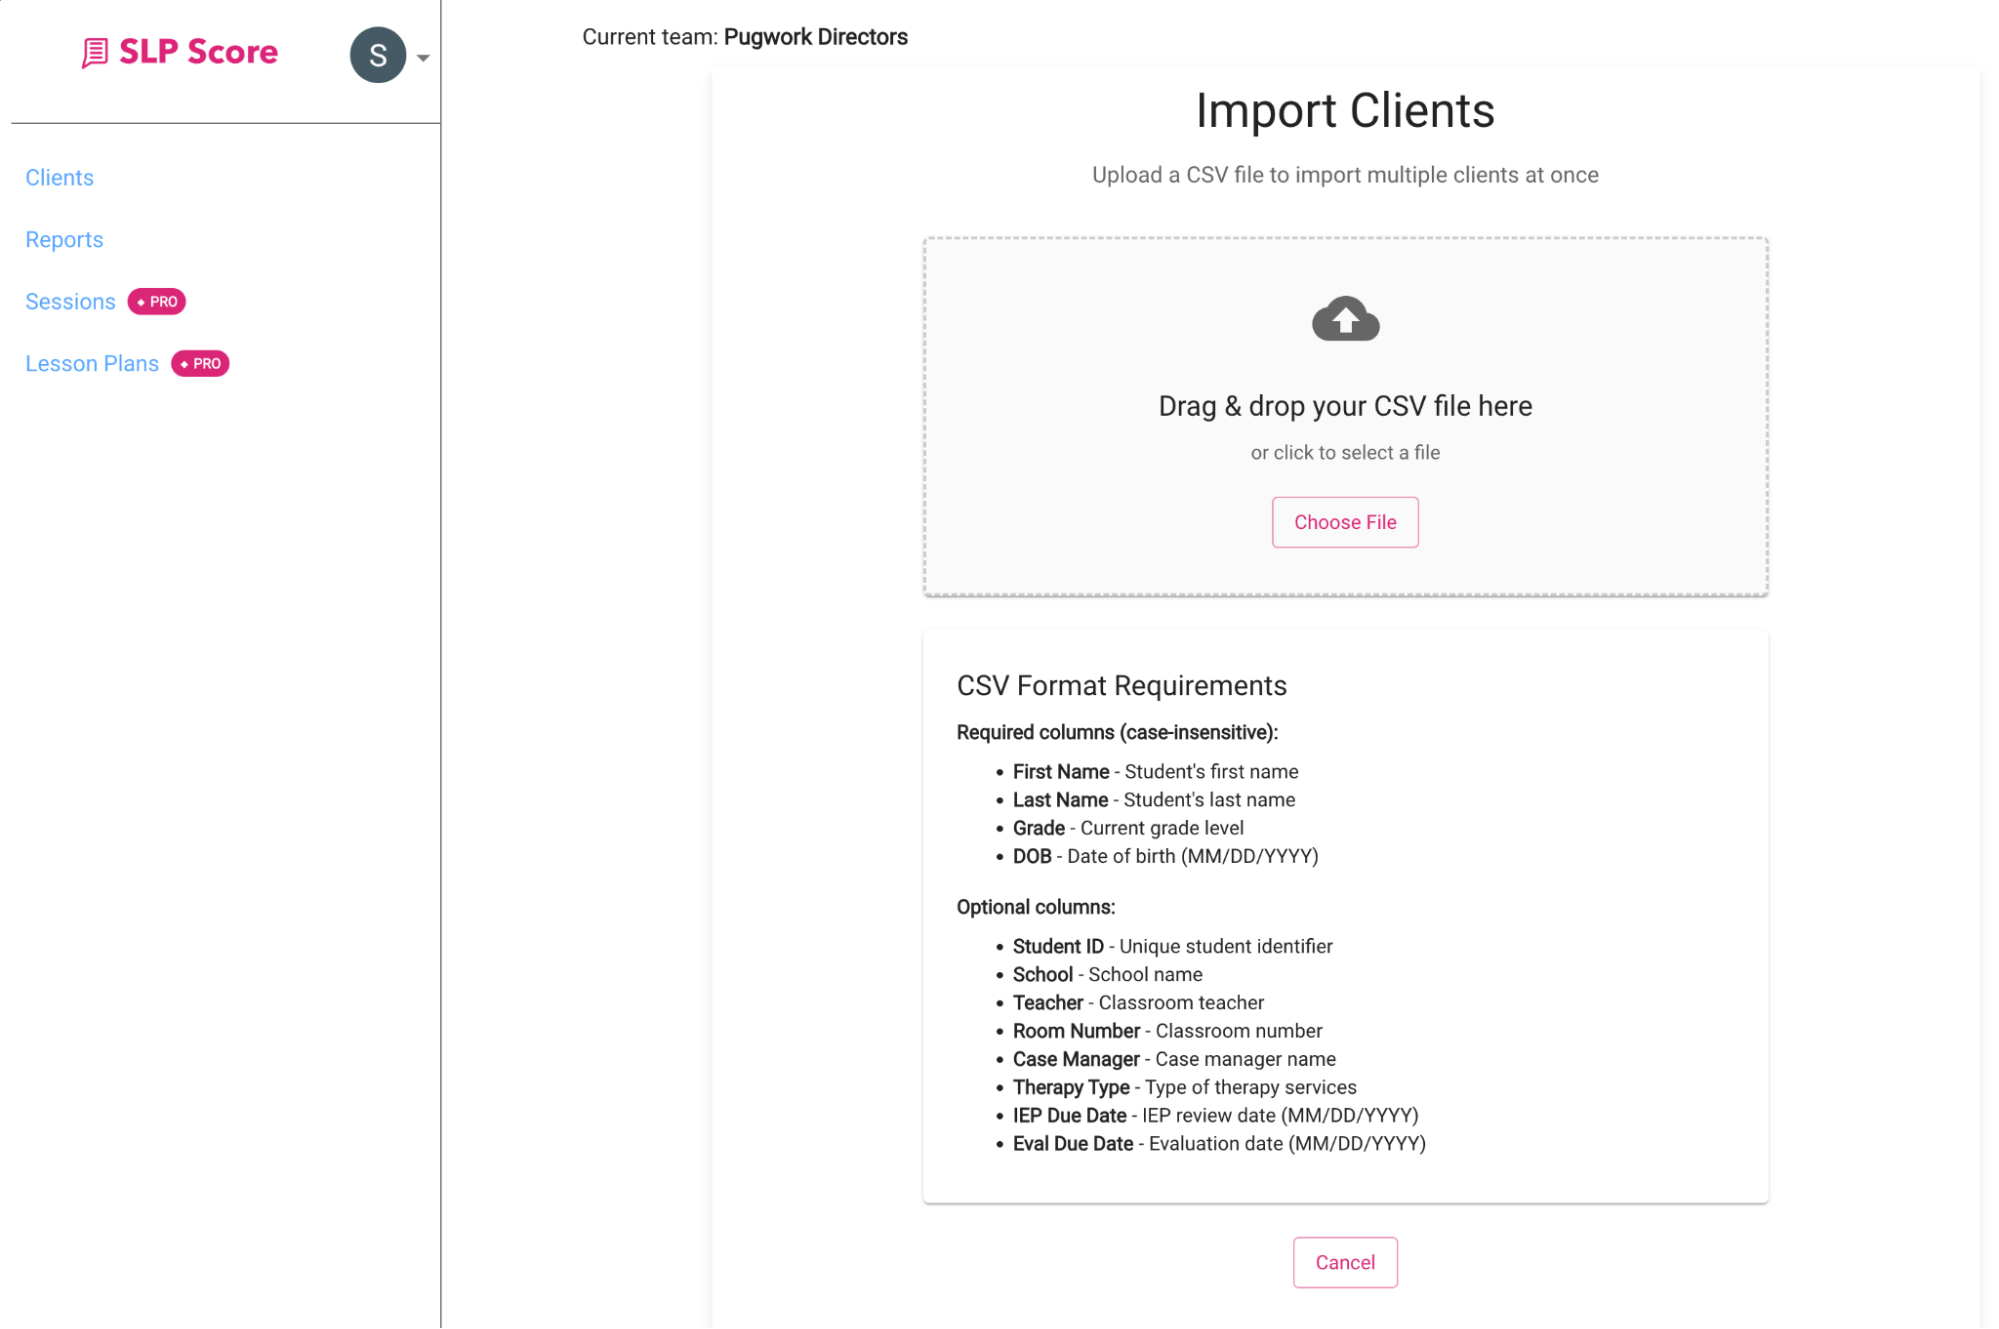
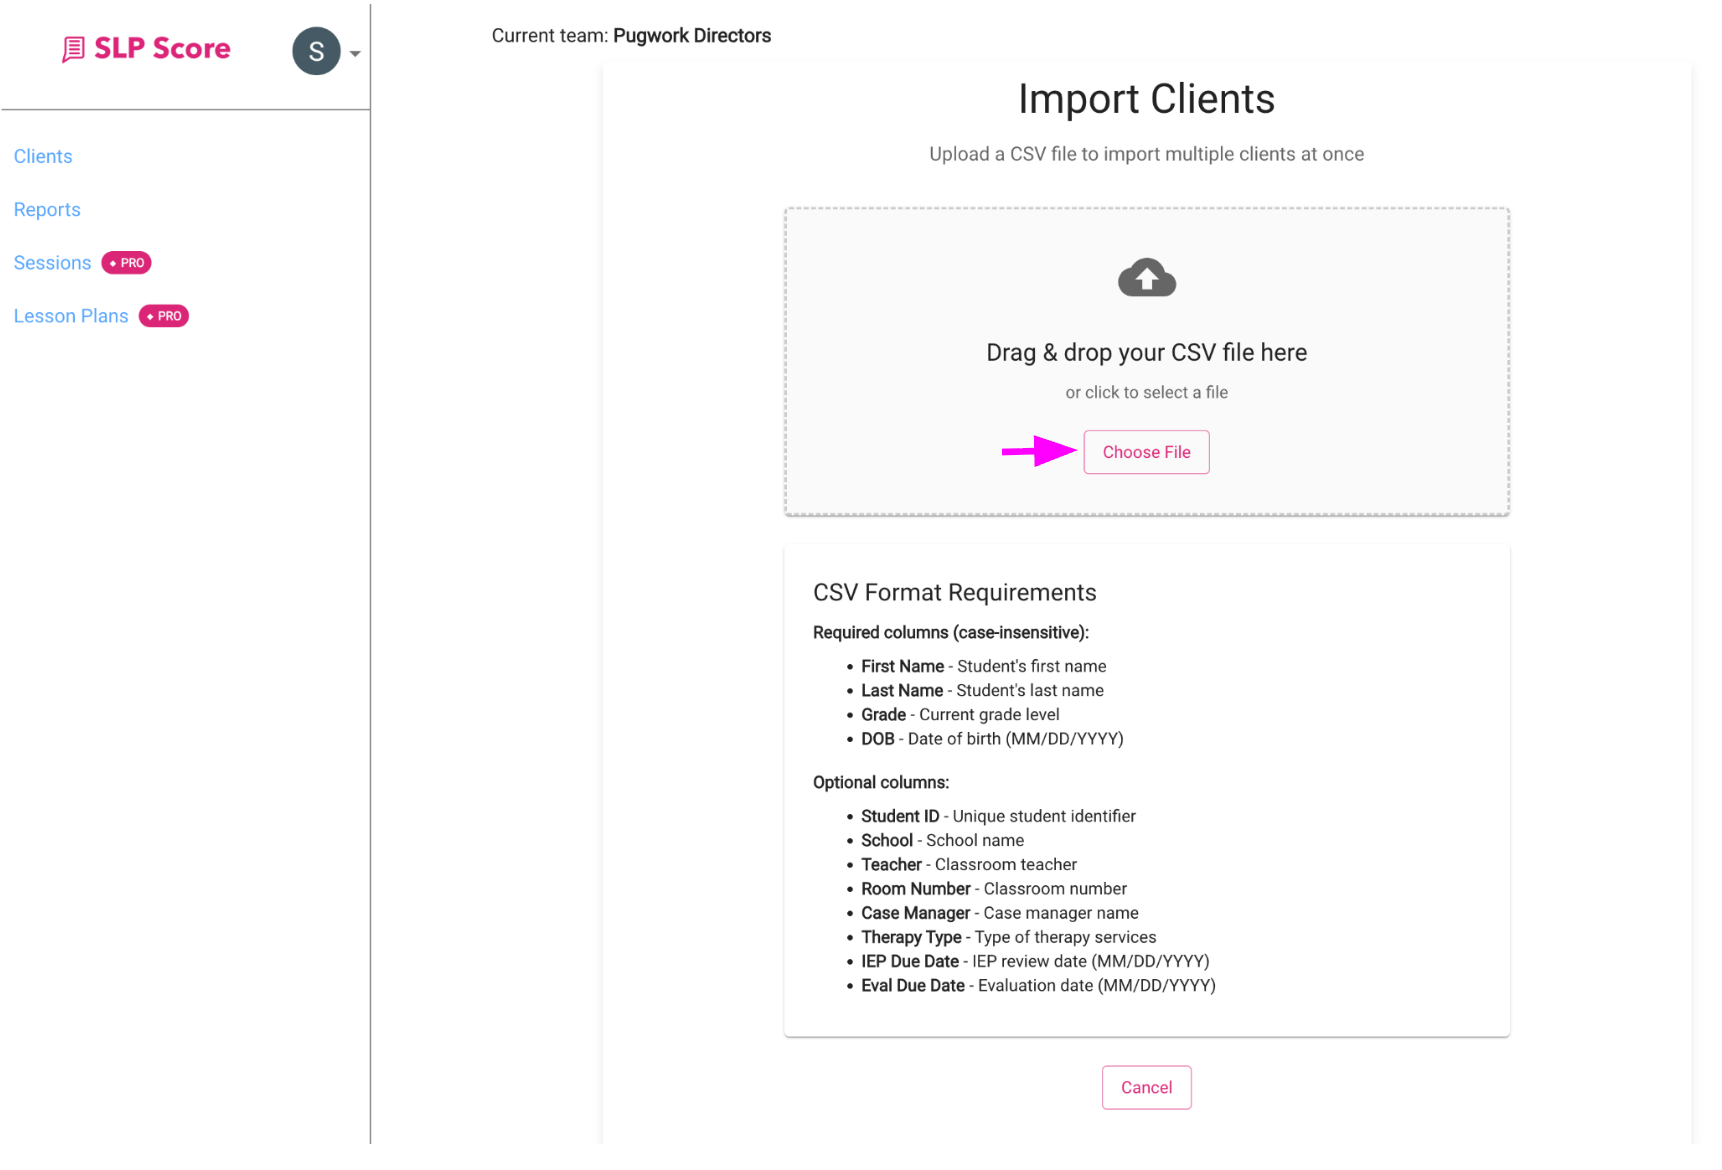
On the Import Clients page, review the CSV Format Requirements.
Required Columns (case-insensitive):
- First Name
- Last Name
- Grade
- DOB (MM/DD/YYYY)
Optional Columns:
- Student ID
- School
- Teacher
- Room Number
- Case Manager
- Therapy Type
- IEP Due Date
- Eval Due Date
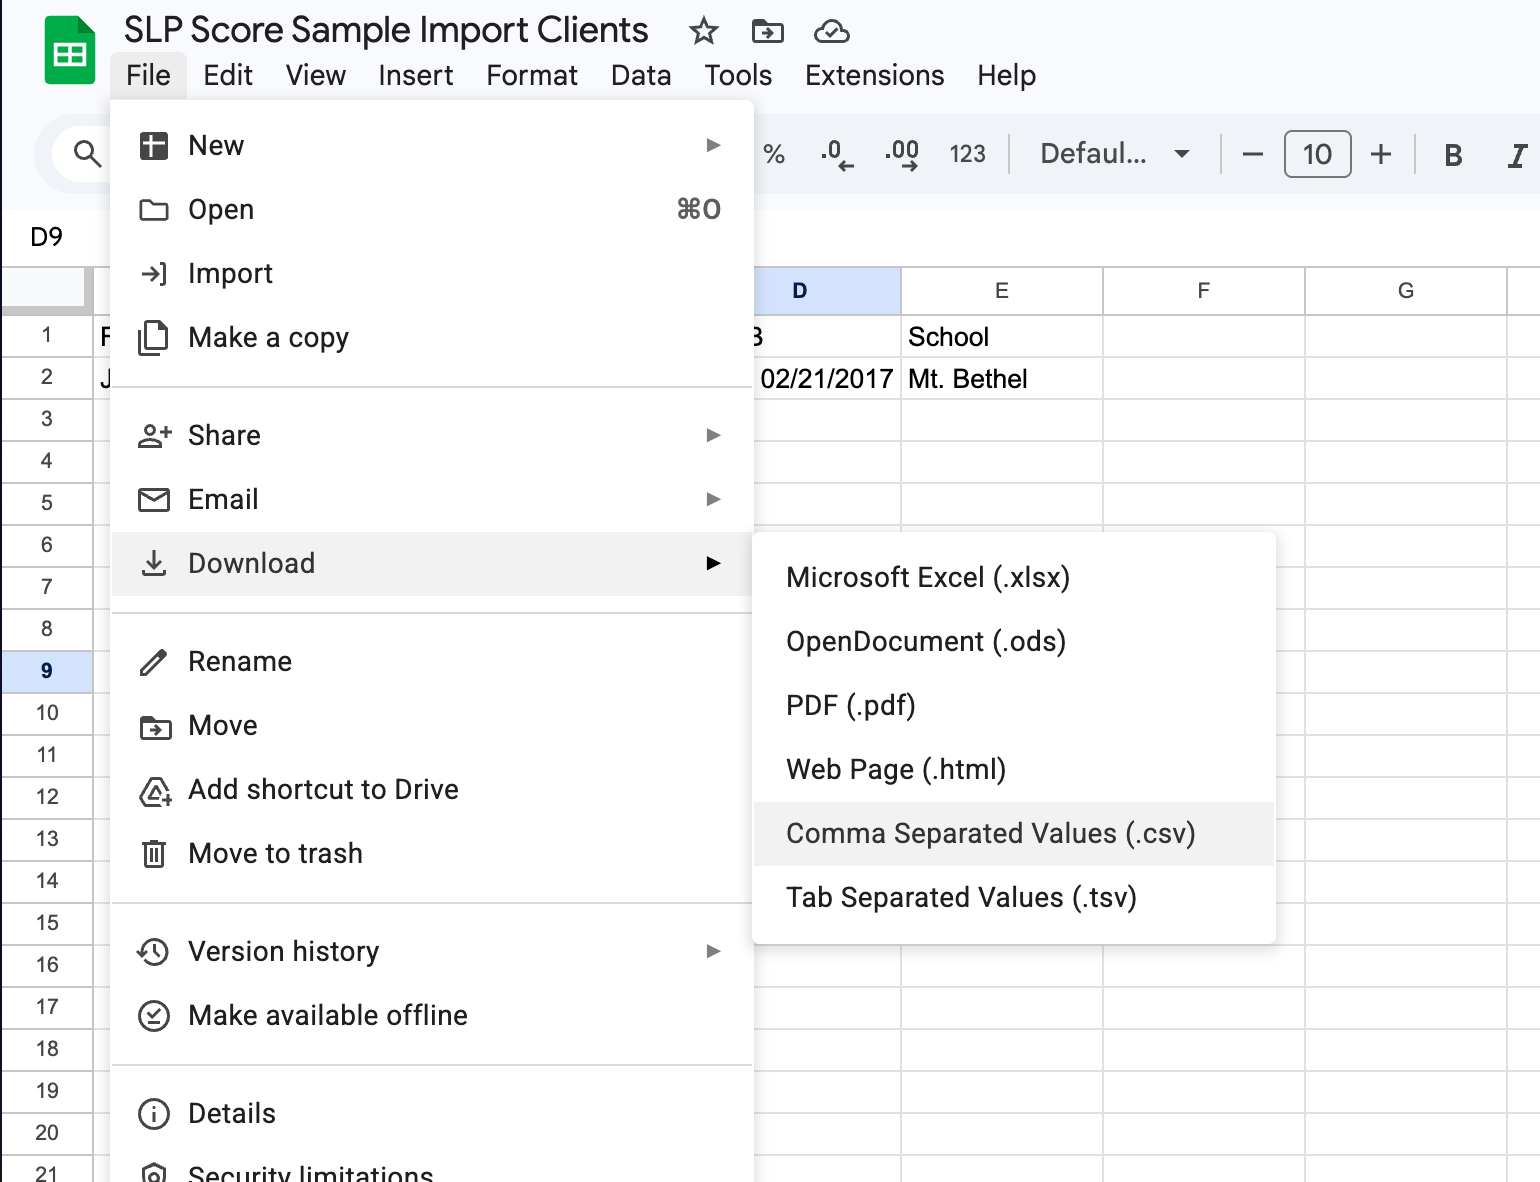
Creating the File in Google Sheets
- Create your spreadsheet using the required column headers
- Click File → Download → Comma Separated Values (.csv)
Step 3: Upload Your CSV
- Click Choose File
- Select your saved CSV file
- The system will move you to the Confirm Import Mapping screen
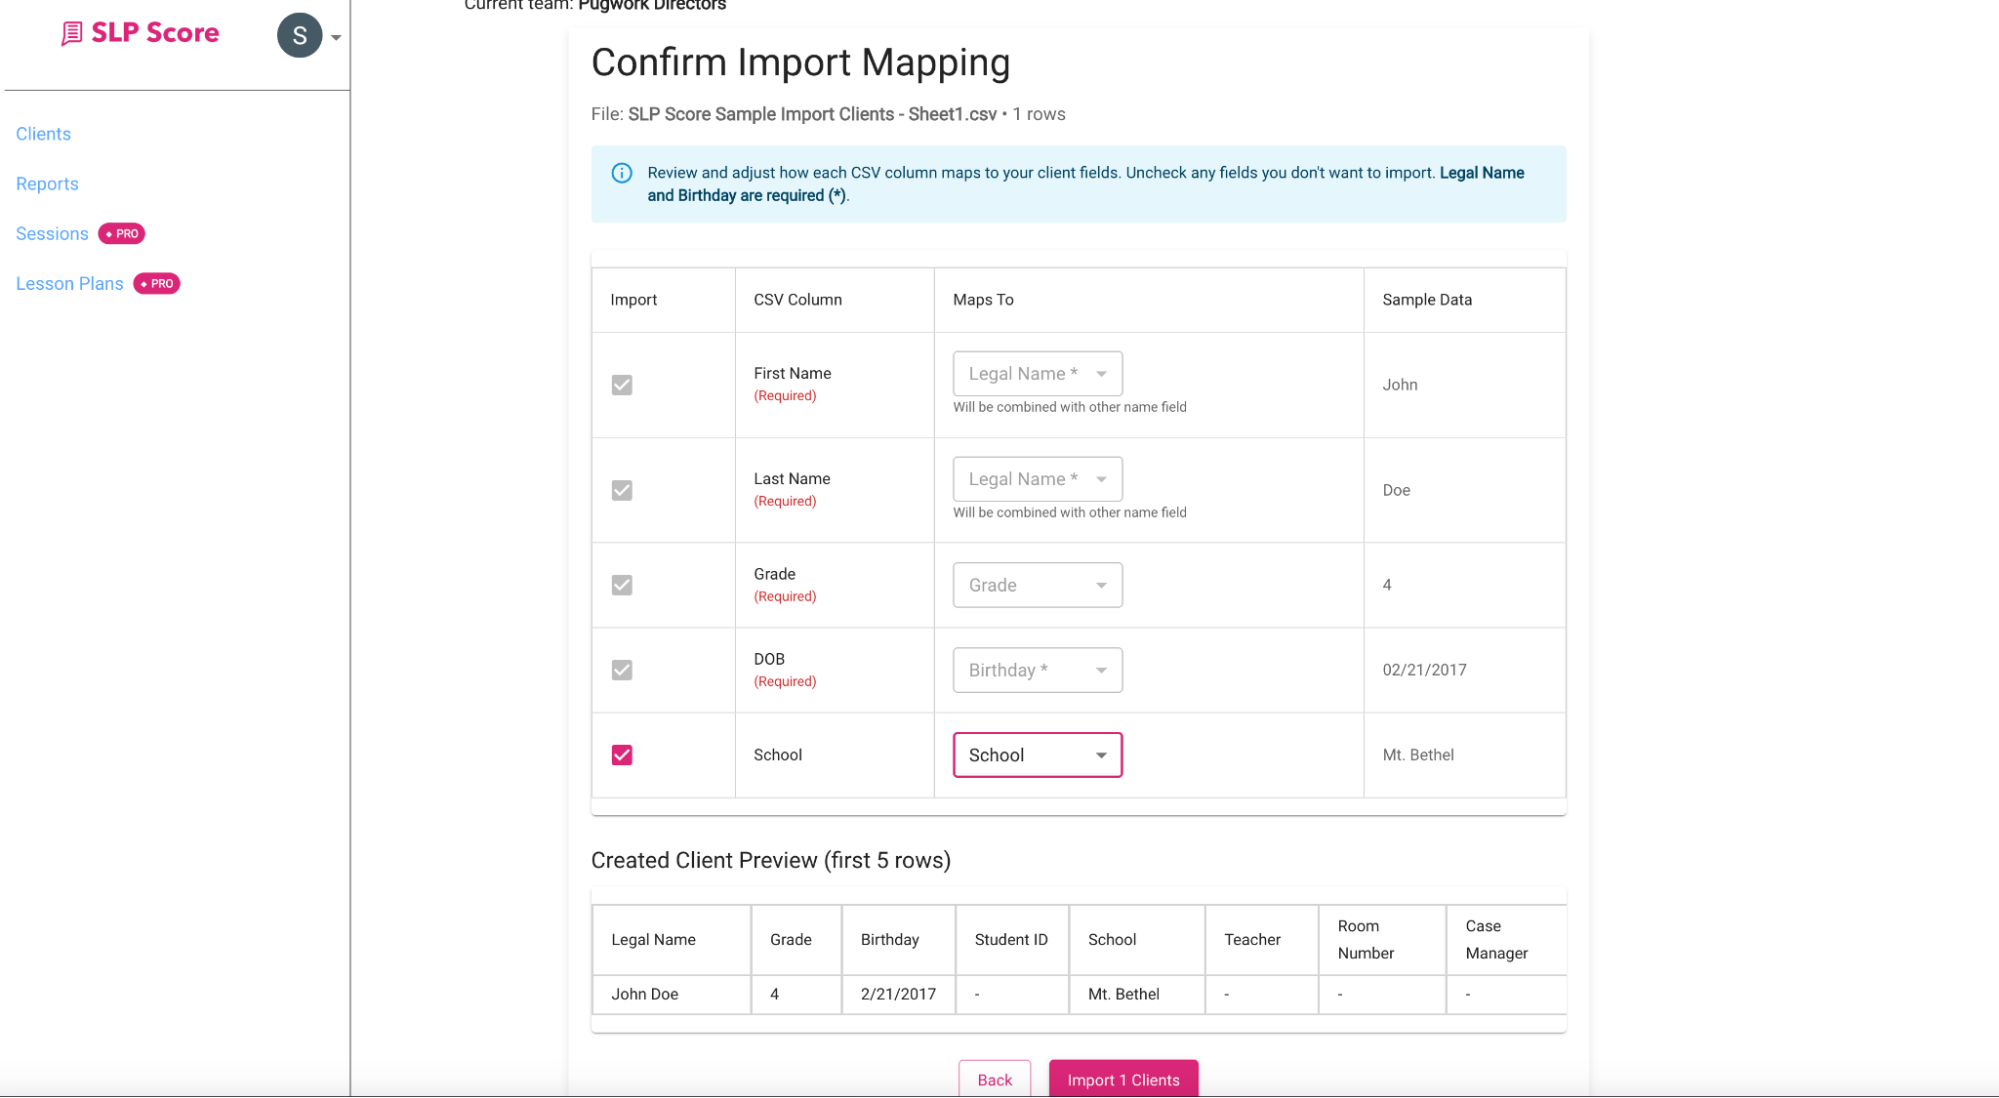
Step 4: Confirm Import Mapping
On the Confirm Import Mapping screen:
- Review each column
- Ensure each CSV column maps correctly to SLP Score fields
- Verify that required fields are mapped properly
- You'll also see a Client Preview before importing.
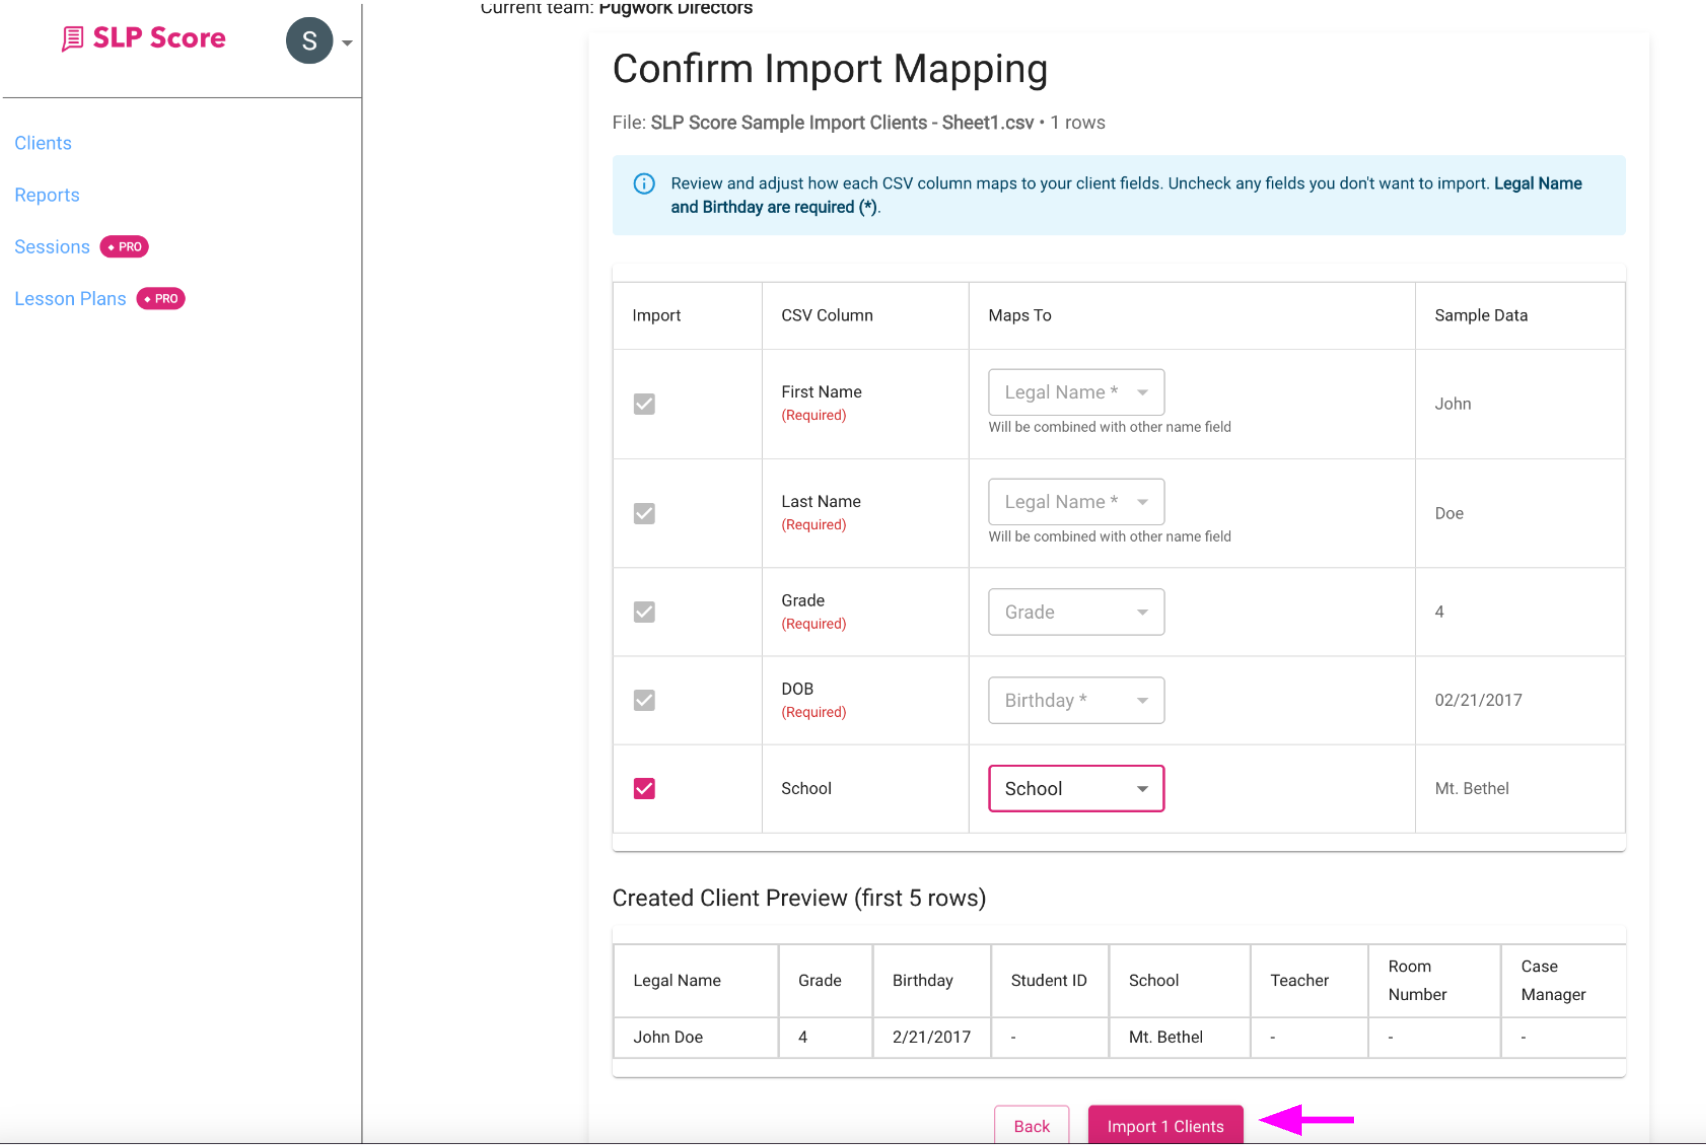
Step 5: Complete the Import
Once everything looks correct:
- Click Import Clients
- You'll see a confirmation message
- Your new clients will now appear in your Clients list
What Happens After Import?
Imported clients behave exactly like manually created ones.
You can immediately:
- Score assessments
- Generate reports
- Create goals
- Plan sessions
- Track progress
Common Mistakes
- Incorrect date formatting (must be MM/DD/YYYY)
- Misspelled column headers
- Forgetting to export as CSV (not Excel .xlsx)
Pro Tip
If you manage a large caseload, export your current list first to use as a formatting template for future imports.